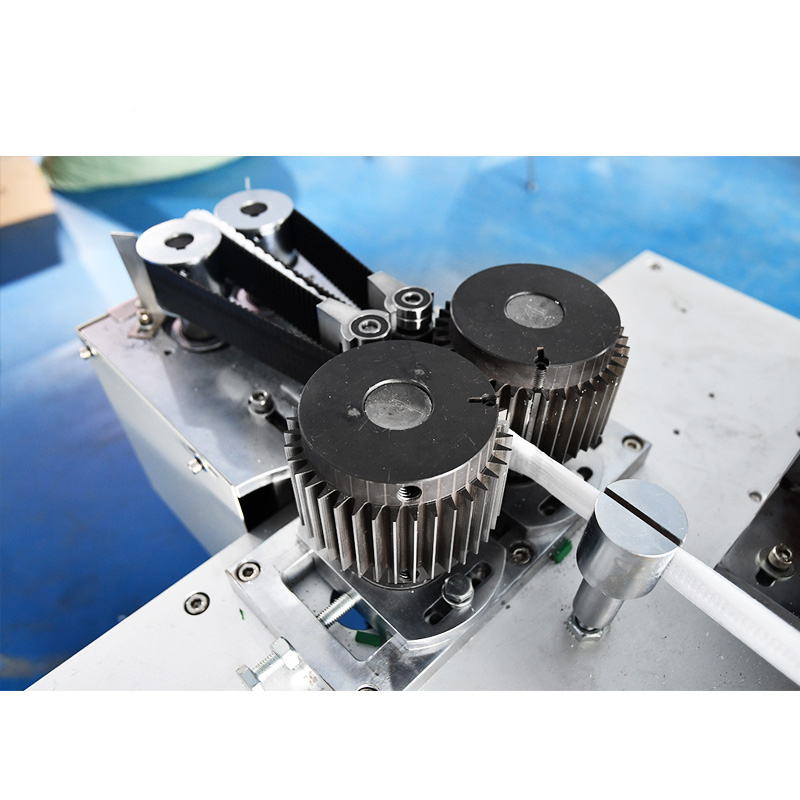
Bar cap machine (hat machine) debugging and startup precautions
2024-04-15
Precautions;

1. Debugging
1. With the cutter as the center, loosen the two fixing screws on the two horizontal rows of embossed tooth sprockets. Then rotate the embossed wheel back and forth to the required position. Tighten the screws until the product is qualified.
2. Adjust the clamping degree between the two sets of iron rods. The aesthetics of the product shall prevail.
3. Adjust the two sets of nylon embossing sticks to make the product indentation uniform and beautiful.
4. Rear embossing wheel. Loosen the two screws on the rear embossing wheel. Move the embossing wheel left and right. Take the rear edge of the non-woven fabric as the best position. The product will be more beautiful. Then tighten the screws.
5. Fold. Based on the width of the raw material, loosen the screws that fix the folding plates on the left and right. Move the folding plates left and right to adjust to two centimeters behind the folding edge of the non-woven fabric. Tighten the screws.
6. How to adjust the rubber band. Pass the rubber band along the hole position, guide wheel and pressure bar to the center tooth of the rear embossing wheel. Based on the center tooth of the rear embossing wheel. Adjust the pressure bar, guide wheel and hole position to the required position. .Until the product is qualified.
7. Cutter. Turn the two large handwheels above the cutter forward and reverse. Adjust until the product is cut off and the product is qualified. Tighten the nut on the large handwheel.
8. Turn the two large handwheels above the transverse embossing wheel forward and reverse. Adjust until the product is pressed firmly and it is qualified.
9. Cutting knife, horizontal ironing, handwheel adjustment method. Forward rotation means retreat, reverse rotation means advance.
10. Rear embossing wheel. Turn the two upper handwheels forward and reverse. Adjust until the product is cut off and the product is qualified. Tighten the lower nut of the large handwheel screw.
11. Unloading rack. Put the raw materials on the unloading shaft and move the paper tube sleeve left and right with the folded edge as the center. Tighten the paper tube sleeve. Manually adjust the hand wheel until the left and right folded raw materials are evenly adjusted. Adjust the manual brake as needed Tension. The larger the raw material, the greater the tension. On the contrary, the smaller it is.
12. The aesthetics of the product should be based on the actual situation. Adjust the left and right positions of the rear embossing wheel to form a straight line without bending. Or adjust the tightness of the two sets of iron rods to achieve the beauty of the shrinkage molding of the product.
2. Start up
1. Turn on the power switch and check whether the ultrasound is on.
2. Press the ultrasonic switch. Press the host to start. Adjust the host speed switch until the required speed. Normal production.
3. Stop the machine. First adjust the speed of the main machine to slow down the speed. Press the main machine to stop. Press the ultrasonic switch.
3. Maintenance and precautions.
1. Regularly check whether the equipment fasteners, bearings, gears, and tooth plates are loose. Tighten them in time.
2. Regularly check whether the ultrasonic chassis and head fan are working. Replace them in time.
3. Regularly check whether the electronic components in the electrical box are loose. Tighten them in time. Remove dust regularly and prevent moisture.
4. It is time to refuel bearings, gears, sprockets and chains to extend the service life of the equipment.
5. Clean the equipment after get off work every day.


